Groups

Contacts Screen
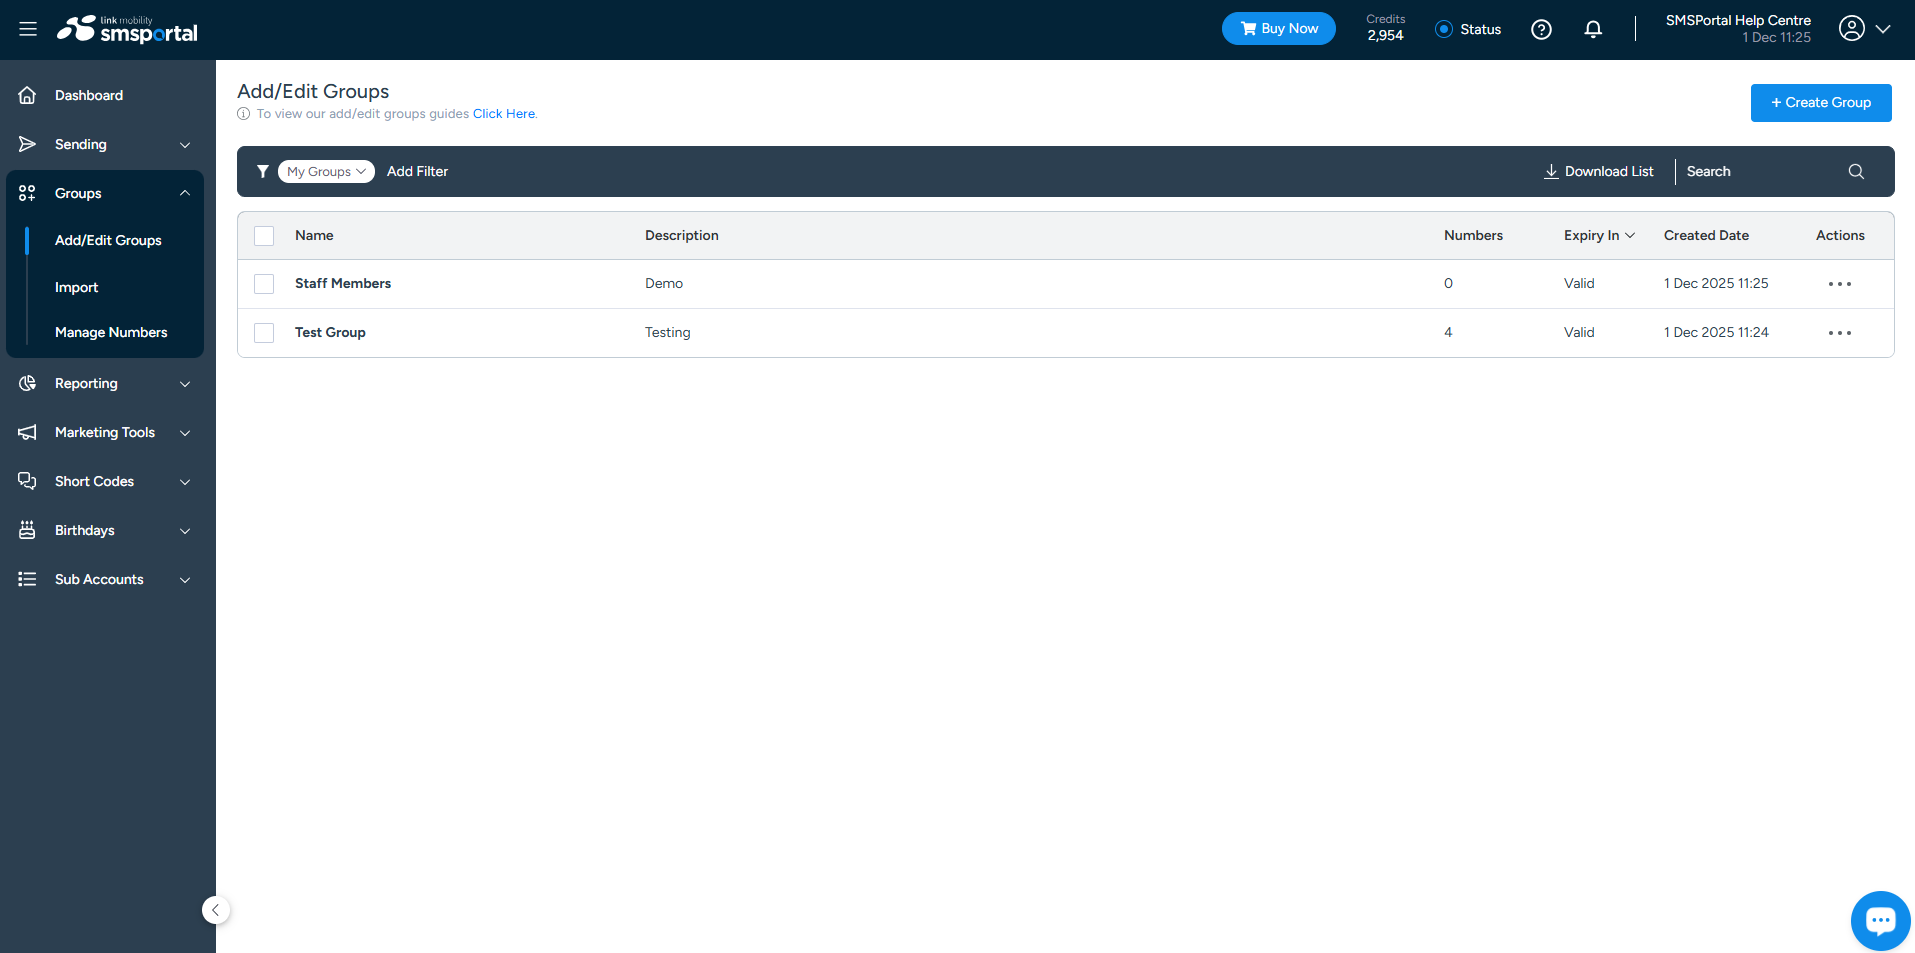
Simply click on "Groups" on the left-hand control panel menu, select the "Add/Edit Groups" option and follow these easy steps:
Step 1: Create
Click on "+ Create Group" at the top right of your screen and complete the required fields.
Step 2: Save
Click on "Create" to save your group.
Important Information:
- Group Retention: Any group that has not been used during the specified retention period, will be set to expire.
- Share group with Sub Accounts: This option is only available if you have any Sub Accounts that require access to the group you have created on your master account.
Updated 2 months ago